


Googleは、昨年12月に限定的なテスター向けに試験的に提供を発表していたコーディングエージェント「Jules」をベータ版で公開したことをGoogle I/Oで発表した。

コーディングエージェント「Jules」
昨年12月に限定的なテスター向けに試験的に提供されていたコーディングエージェント「Jules」は、自然言語によるプロンプトを通した環境の構築から実際のコーディングやテスト、GitHubと統合された操作で動作する"An Asynchronous Coding Agent"(非同期コーディングエージェント)。GoogleアカウントとGitHubアカウントが必要で、アカウントのレポジトリと連動した操作が可能だ。情報はGoogleに提供されるので、オプトアウトも可能なプライバシーポリシーを読んで試すことができる。
実際に試してみると、アカウントと連動するリポジトリを選択し、プラン(何を行うか?)を英語で求められる。画像やテーブルを生成するマークアップタグをコマンドプロンプトから作成する自作のPerlコードに対して、最新バージョンのPythonで動作するように"Perlで書かれているコードをWindows 11上のPythonで動くように書き換えて"と日本語で返せばやりとりがはじまった。「どのコードだ?」と聞いてくるので「一個しかないはずだ」と返すと"Your Right!"と陽気に答えるJules。指定している筆者のレポジトリにはひとつのPerlスクリプトしか置いていない。これを認識したのだ。その後、実際に細かく指定せずにプランを作ってくれた。
-
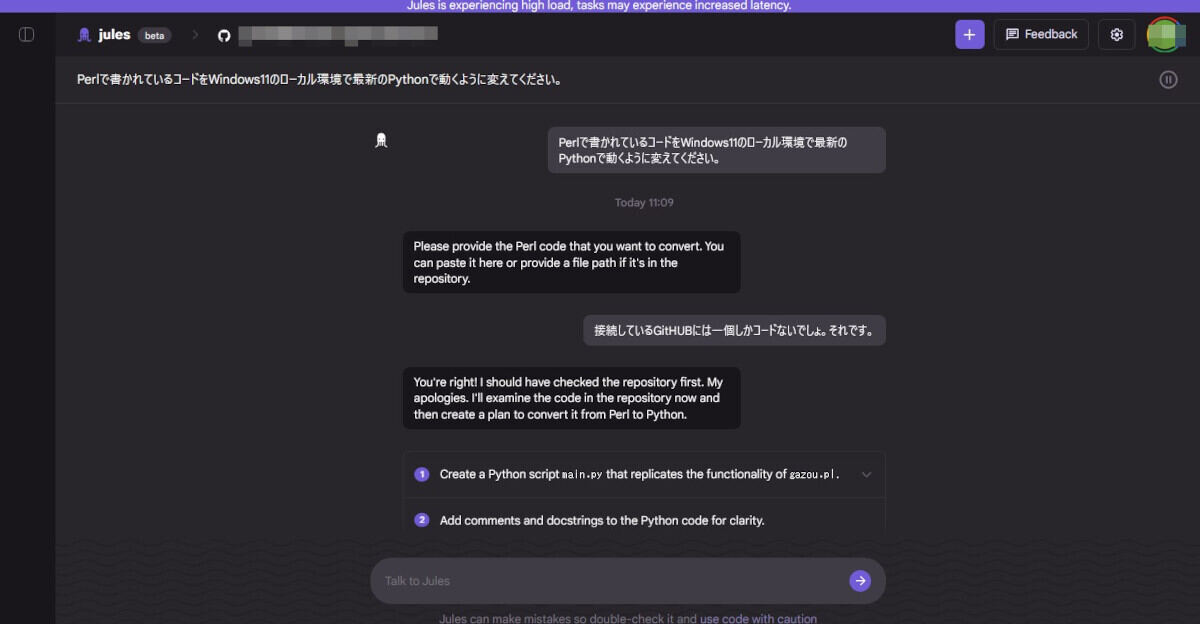
どのコードだ?と聞いてくるので「一個しかないはずだ」と。ちゃんと理解して目的のコードをベースにしてくれた

プランでは
1.main.plをmain.pyに変えて
2.コメントを添える
3.テストを実施
4.リポジトリから過去のgazou.plを消去
5.コミットメッセージの提出
を提案してきた。

これを承認すると、すこしThink...したあとにザッサーと一気にPythonコードに書き換えていく。

「Publish branch」ボタンが出てくるのでこれを押すとPythonコードに書き換えるブランチが自動で進んでいく。

最後に「View branch」ボタンが出てくるので、これを押すと

ブラウザでGoogle-labs-julesが作成したブランチを確認できる。

作成されたコードは以下のようになった。


"""
This script replicates the functionality of the Perl script gazou.pl.
It provides different modes to generate text files with specific formats
for image galleries or tables.
"""

def main():
    """
    Main function to drive the script.
    It prompts the user for a mode and then executes the corresponding logic.
    """
    # Prompt the user to select a mode.
    mode = input("通常形式複数個なら「y」を。colspanなら「x」を。テーブルなら「t」を:")

    if mode == 'y':
        # Mode 'y': Normal format, multiple items.
        # This mode generates a list of images, each centered.
        total_items = int(input("全個数を入力:"))
        # Open gazou.txt for writing with UTF-8 encoding.
        with open("gazou.txt", "w", encoding="utf-8") as f:
            # Loop through the specified number of items.
            for a in range(1, total_items + 1):
                # Format image numbers with leading zeros (e.g., 001, 010).
                if a < 10:
                    f.write("|photo_center\n")
                    f.write(f"|I@00{a}.jpg,▲▲▲|\n\n")
                else:
                    f.write("|photo_center\n")
                    f.write(f"|I@0{a}.jpg,▲▲▲|\n\n")
    elif mode == 'x':
        # Mode 'x': Colspan format.
        # This mode generates a single row of images, potentially for a colspan layout.
        horizontal_items = int(input("横の個数を入力:"))
        # Open gazou.txt for writing with UTF-8 encoding.
        with open("gazou.txt", "w", encoding="utf-8") as f:
            f.write("|photo_center\n")
            if horizontal_items == 1:
                # Special case for a single item.
                f.write("|I@001.jpg,▲▲▲|\n") # In Perl, this was I@001.jpg, so kept 1-indexed.
            else:
                # Build a line with multiple image references.
                image_line = ""
                for i in range(horizontal_items): # 0-based indexing for multiple items.
                    # Format image numbers with leading zeros.
                    if i < 10:
                         image_line += f"|I@00{i}.jpg"
                    else:
                         image_line += f"|I@0{i}.jpg"
                image_line += "|\n"
                f.write(image_line)
                f.write("|M@▲▲▲|\n") # Common caption for the row.
    elif mode == 't':
        # Mode 't': Table format.
        # This mode generates an HTML table structure.
        vertical_items = int(input("縦の個数を入力:"))
        horizontal_items = int(input("横の個数を入力:"))
        # Open table.txt for writing with UTF-8 encoding.
        with open("table.txt", "w", encoding="utf-8") as f:
            # Write the opening HTML table tags.
            f.write('<div><table class="Table1" border="0" cellPadding="0" cellSpacing="1" >\n')
            # Loop for each row.
            for a in range(vertical_items):
                f.write("<tr>\n<th>data</th>") # First cell is a header.
                # Loop for subsequent cells in the row.
                for b in range(1, horizontal_items):
                    f.write("<td>")
                    f.write("data") # Placeholder data.
                    f.write("</td>\n")
                f.write("</tr>\n")
            # Write the closing HTML table tags.
            f.write("</table></div>\n")
    else:
        # Invalid Mode: If the user input doesn't match 'y', 'x', or 't'.
        print("end")

if __name__ == "__main__":
    # Execute the main function when the script is run directly.
    main()
とりあえず試してみると、少々文字コードの使い勝手が異なってしまって一発でという形ではなかったが、コードを変える必要はなく、ほぼそのまま実行できた。最初のプランの段階で対話を通じて詳細な詰めをするほど効果が高いとのことだ。ドキュメンテーションは公式サイトに設置してある。
-

文字コードで若干のエラーが出たが、コードを一切変えずに実行は可能であった


