


WSLのLinuxをsshで使う
サーバとしてLinuxを使っているのであれば、sshでログインして作業を行うというのが一般的だ。Windows 10に導入されたばかりのWSL (Windows Subsystem for Linux)ではsshdをバックグラウンドタスクとして動作させておくことができなかったが、2018年Windows 10 春のアップデートで可能になった。WSLのLinuxにも、ほかのサーバと同じようにログインして作業することができる。
これはなかなか便利だ。ネットワークの設定は必要だが、Windows 10 PCを動作させ続けておいて、そこで動作しているUbuntuに、仕事先のネットワークなどからログインして作業を行うといったことも可能になる。今回は、そのあたりについて解説しよう。
WSL sshdのセットアップ方法
先日公開されたWSLのUbuntu 18.04を例にあげて設定方法を紹介する。まず、次のようにしてホストキーを作成する。ファイルパスは/etc/ssh/sshhostrsa_keyにして、パスフレーズは何も入力せずにエンターキーを押す。
daichi@DESKTOP-DVVLKV9:~$ sudo ssh-keygen
Generating public/private rsa key pair.
Enter file in which to save the key (/root/.ssh/id_rsa): /etc/ssh/ssh_host_rsa_key
Enter passphrase (empty for no passphrase):
Enter same passphrase again:
Your identification has been saved in /etc/ssh/ssh_host_rsa_key.
Your public key has been saved in /etc/ssh/ssh_host_rsa_key.pub.
The key fingerprint is:
SHA256:xxxxxxxxxxxxxxxxxxxxxxxxxxxxxxxxxxxxxxxxxxx root@DESKTOP-DVVLKV9
The key's randomart image is:
+---[RSA 2048]----+
|o=.o E.          |
|.+X.+++o         |
|oo.o.+o          |
|... o... .       |
|   .o...S...     |
|+. ...B. +       |
|.+.. O oO        |
|..  + =+.+       |
|. .. oo*+        |
+----[SHA256]-----+
daichi@DESKTOP-DVVLKV9:~$
ここは簡単にパスワード認証でログインできるようにしたいので、次のように/etc/ssh/sshd_configファイルを編集する。もし外部ネットワークからログインして使うとか、プライベートではないネットワークでも使うということになったら、パスワード認証の機能は無効にして、公開鍵のみでログインするように変更してほしい。
■ /etc/ssh/sshd_configを編集してパスワード認証を許可する
--- /etc/ssh/sshd_config.org    2018-06-04 18:30:53.596984600 +0900
+++ /etc/ssh/sshd_config        2018-06-04 19:52:20.301359400 +0900
@@ -54,11 +54,13 @@

 # To disable tunneled clear text passwords, change to no here!
 PasswordAuthentication no
+PasswordAuthentication yes
 #PermitEmptyPasswords no

 # Change to yes to enable challenge-response passwords (beware issues with
 # some PAM modules and threads)
-ChallengeResponseAuthentication no
+ChallengeResponseAuthentication yes
+#ChallengeResponseAuthentication no

 # Kerberos options
 #KerberosAuthentication no
次は自動起動の設定だ。Ubuntuにログインすると同時にsshdが動作してほしいので、最初のUbuntu起動時にsshdが自動起動するように設定を行う。デーモンの制御には管理者権限が必要になるので、まず次のように/etc/sudoersファイルを変更して、sudoの実行にパスワードがいらないようにする(もちろんセキュリティ的にはどうかと思うので、気になるならこれは設定しないでおく)。
■ /etc/sudoersを編集してsudoの実行にパスワードを不要にする
--- /etc/sudoers.org    2018-06-04 19:55:29.072105500 +0900
+++ /etc/sudoers        2018-06-04 17:49:08.346115200 +0900
@@ -23,7 +23,8 @@
 %admin ALL=(ALL) ALL

 # Allow members of group sudo to execute any command
-%sudo  ALL=(ALL:ALL) ALL
+#%sudo ALL=(ALL:ALL) ALL
+%sudo  ALL=(ALL:ALL) NOPASSWD: ALL

 # See sudoers(5) for more information on "#include" directives:
次に、sshdを自動的に起動するように~/.bash_aliasesファイルに次のスクリプトを追加する。
■ Ubuntu起動時にsshdが起動されるように~/.bash_aliasesにスクリプトを追加
if ! service ssh status > /dev/null 2>&1
then
        sudo service ssh start > /dev/null 2>&1
fi
この設定だと少なくともUbuntuを1回は起動する必要があるのだが、これも自動化したい場合には第125回の記事を参考にして、Windows 10ログオン時にUbuntuが自動起動されるようにWindows 10の設定を行ってもらえればと思う。
ssh経由でWSLのUbuntuにログイン
動作を確認するには、いったんWindows 10を再起動してみるとよい。設定がうまくいっていれば、Ubuntuを起動した後は次のようにsshdが動作していることを確認できる。
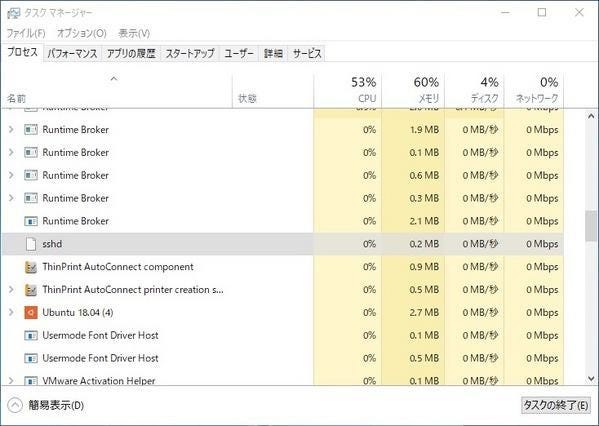 |
sshdが起動していることを確認 |
次のこのホストに設定されているIPアドレスを確認する。
■ ホストに設定されているIPアドレスを確認(Windows 10とWSLは同じIPアドレスを共有している)
daichi@DESKTOP-DVVLKV9:~$ ifconfig
eth0: flags=4163<UP,BROADCAST,RUNNING,MULTICAST>  mtu 1500
        inet 192.168.185.143  netmask 255.255.255.0  broadcast 192.168.185.255
        inet6 fe80::207b:8ece:a1ad:531d  prefixlen 64  scopeid 0x0<global>
        ether 00:0c:29:0c:9a:b1  (Ethernet)
        RX packets 0  bytes 0 (0.0 B)
        RX errors 0  dropped 0  overruns 0  frame 0
        TX packets 0  bytes 0 (0.0 B)
        TX errors 0  dropped 0 overruns 0  carrier 0  collisions 0

lo: flags=73<UP,LOOPBACK,RUNNING>  mtu 1500
        inet 127.0.0.1  netmask 255.0.0.0
        inet6 ::1  prefixlen 128  scopeid 0x0<global>
        loop  (Local Loopback)
        RX packets 0  bytes 0 (0.0 B)
        RX errors 0  dropped 0  overruns 0  frame 0
        TX packets 0  bytes 0 (0.0 B)
        TX errors 0  dropped 0 overruns 0  carrier 0  collisions 0

daichi@DESKTOP-DVVLKV9:~$
このIPアドレスにアクセスできるほかのホストから確認したIPアドレスに対してsshでログインを試みる。次のようにログインを確認できれば設定は完了だ。
■ sshでログインできることを確認
PS C:\Users\daich> ssh daichi@192.168.185.143
The authenticity of host '192.168.185.143 (192.168.185.143)' can't be established.
RSA key fingerprint is SHA256:xxxxxxxxxxxxxxxxxxxxxxxxxxxxxxxxxxxxxxxxxxx.
Are you sure you want to continue connecting (yes/no)? yes
Warning: Permanently added '192.168.185.143' (RSA) to the list of known hosts.
Password:
Welcome to Ubuntu 18.04 LTS (GNU/Linux 4.4.0-17134-Microsoft x86_64)

 * Documentation:  https://help.ubuntu.com
 * Management:     https://landscape.canonical.com
 * Support:        https://ubuntu.com/advantage

  System information as of Mon Jun  4 19:53:20 DST 2018

  System load:    0.52      Memory usage: 29%   Processes:       12
  Usage of /home: unknown   Swap usage:   0%    Users logged in: 0

  => There were exceptions while processing one or more plugins. See
     /var/log/landscape/sysinfo.log for more information.


  Get cloud support with Ubuntu Advantage Cloud Guest:
    http://www.ubuntu.com/business/services/cloud

1 package can be updated.
0 updates are security updates.


Last login: Mon Jun  4 19:52:37 2018 from 192.168.185.143
daichi@DESKTOP-DVVLKV9:~$
sshでログインして作業できるようになると、それがどこかのクラウドで動作しているのか、Windows 10のWSLで動作しているのか、物理サーバで動作しているのか、使っているほうはそれほど気にならないだろう。
本格的に使うならセキュリティに注意!
Linuxを使っている方ならよく知っていると思うが、sshでログインできるようになると、かなりの作業ができるようになる。このあたりはスキルの差がでやすい部分でもあるのだが、とにかく”楽し放題”の環境が出来上がるわけだ。
ここで1点、重要なことがある。こうした使い方で、特に外部からログインして利用するような使い方をする場合には、セキュリティ設定に気をつけてほしい。少なくともsshによるアクセスは公開鍵のみ許可するほうがよいし、接続条件も絞り込めるなら絞り込んだほうがよい。Windows 10側のセキュリティ設定も確認して強化できるならそのほうがよいだろう。緩い設定だと便利ではあるのだが、攻撃に対しては弱くなりがちなのでくれぐれも注意していただきたい。


